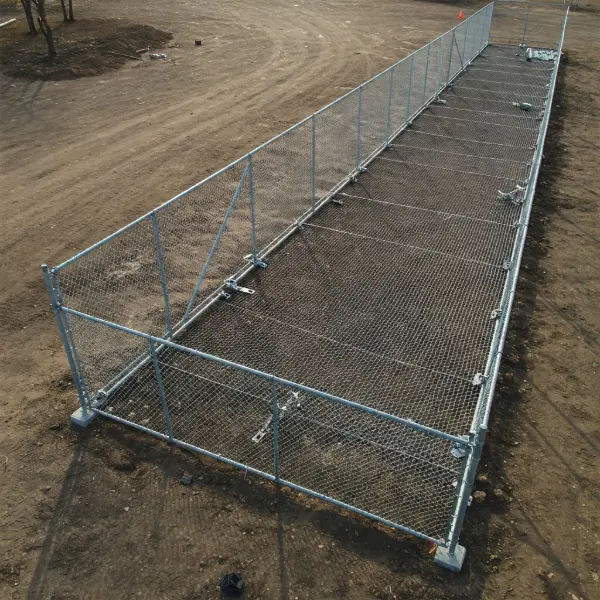
Many do-it-yourselfers like to install their own fences. But there are others who prefer to have their fences installed by the best fencing company in Buffalo.
So, what happens when you hire a professional fence installation company to build your fence? Let’s learn about the expert way in detail below!
The Process Of Professional Fence Installation
Step 1- Fence Estimator Visit
The fencing contractors will come to your property and study your land. They will measure the run of the intended fence with a measuring tape or a device. After that, the estimator will confirm you with certain aspects of the professional fence installation process such as –
- Style of fence
- Fence material
- Time and cost of the fencing project
Step 2 - Making Necessary Preparations And Planning The Layout
Once you agree with the details and sign the contract, the second step of the fence installation project will begin which includes –
- Determining The Property Line
The professional fence installation contractors start by establishing the property lines of your yard.
- Obtaining The Fencing Permits
Next, the fencing contractors make sure your project plan follows all the local building codes. They check with the local city hall or town building inspector. Thereafter, they obtain a permit for the whole fencing project.
- Contact 811
The fence installation contractor calls 811 to mark any gas or utility lines on the property.

Step 3 - Measuring And Marking The Spacing
A crucial step in the professional fence installation process is measuring for an even layout. The experts take extra care during this process. This is to make sure the fence sits on an even line, the spacing between the posts is accurate, and the corners are squared off.
- Laying Out The Fence Design
The professionals lay out the perimeter of the fence by using batter boards. They start by identifying corners. Then, they hammer the batter boards into the ground by using a rubber mallet, a little beyond the corner points.
Next, they wrap a mason line around the batter board. They keep the string 5-6 inches away from the property line.
- Squaring The Corners
This step ensures the fence is straight whilst creating a clean-looking appearance. The professionals start by measuring 3 feet down the mason line and mark it with spray.
Next, they measure and mark 4 feet down the perpendicular mason line. They create a triangle by measuring the distance between the two marks. The experts know they have a perfectly squared-off corner when the line is 5-feet long.
- Marking The Post And Gate Locations
The professionals hammer stakes into the area where the posts will go. They mark the location of gates as well in this step.
- Removing The Mason Line
After placing the stakes, the contractors use a pencil or marker to mark the location of the main line on the batter boards. They remove the string to start digging.
Step 4 - Digging The Post Holes
Now, the professional fence installation contractors dig holes based on the marked stakes in the ground.
Step 5 – Setting The Fence Posts In Concrete
- Filling The Hole With Dry Concrete Mix
Once the holes have been prepared, the professionals start pouring concrete about 6 inches of the way up the hole.
- Setting Posts In Place
Next, the professional fence installation contractor sets the fence posts in the middle of the hole.
- Holding The Post In Place With Braces
Now, the stake of the brace system is hammered to the ground with a rubber mallet. Then, the end of the bracket drilling is attached to the post with a single screw.
- Pouring Concrete
The professionals pour the concrete into the hole with a shovel. They keep doing this until the concrete is a few inches below ground level.
- Repeat
The above steps are repeated until all the fence posts are complete.
Step 6 – Installing Fence Railings
- Removing Braces And Batter Boards
After the concrete has cured, the professionals remove the braces from the posts. They also take down the batter boards from the ground.
- Measuring And Marking The Rail Locations
The fence contractor measures and marks the location of the rails by using a level.
- Measuring And Cutting The Rails
Next, the distance between the edges of the two fence posts is measured. And based on this measurement, the contractor cuts the rail using a circular saw.
- Attaching The Rails
The professionals hold up the rail to the outside of the first post. They pre-drill 2 holes before attaching the exterior deck screw. Then, by using 3-inch exterior screws, they drill the rail into place. They use the same process when attaching the rail to the other post.
Step 7 - Attaching Panels Or Fence Pickets To The Rails
Pre-assembled Panels: The professional fence installation contractors set up the panel flush with the rail. Then, they affix the panel to the outside of the fence by using a pneumatic nailer with 1-1/2- inch nails.
Fence Pickets: Using a level, the experts ensure the first picket is plumb to the rail. Then, they affix it to the outside of the rails using a pneumatic nailer.
Step 8 - Affixing Post Caps
In the last professional fence installation step, the experts attach the post caps to the top of the fence posts. This provides a clean and finished look to the fence. After everything is done, the fencing crew picks up all the debris from the work.
All Set For Your Professional Fence Installation Project?
Then, get in touch with KD Fence & Deck Services – the best fence installation company in Buffalo. For over 5 years, our team has been beautifying Buffalo and the surrounding areas with superior fence & deck services.
At KD Fence & Deck Services, our expert fencing crew handles all the fencing installation details so you don’t have to. You just sit back and relax while our licensed installers complete the installation for you.
