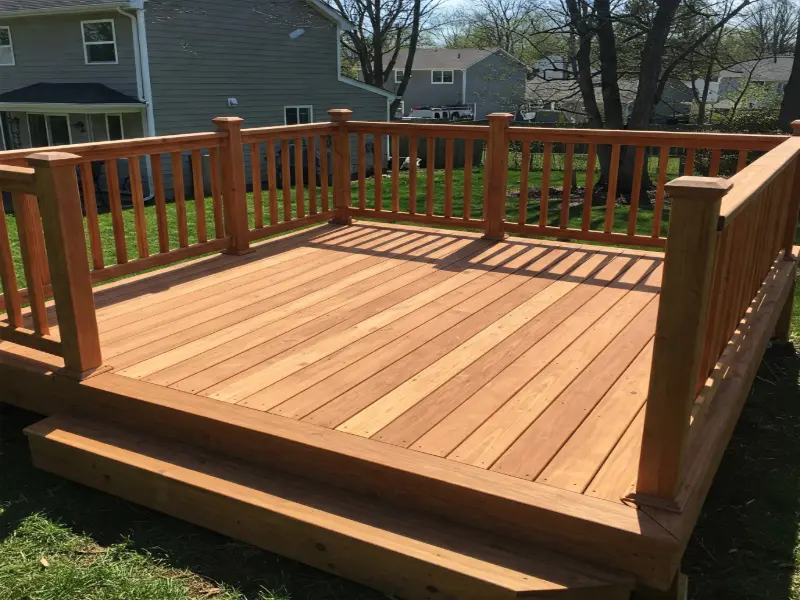
Adding railings to your deck and stairs is safer and stylish for your house. Whether it’s to prevent accidents or improving how your home looks, it’s helpful to learn how to properly install deck railing so that you can obtain a strong and gorgeous result.
In this article, we are going to show you how to install stair railings and installing railing on stairs so that you can make your project easy and effective.
Why Railings Matter
Railings have two great uses: they keep people safe from falling and make your outdoors look better. If you have kids, elderly people, or regular visitors, a solid railing system is a must-have for your stairs and deck.
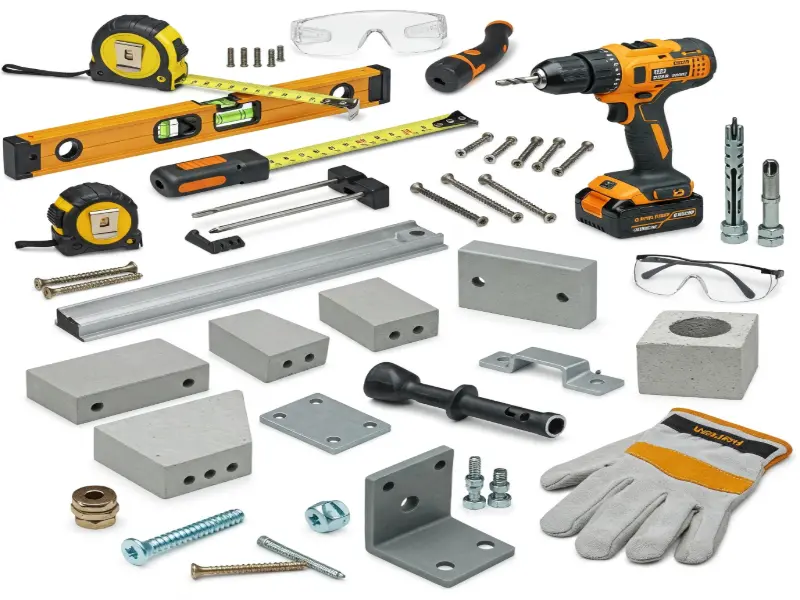
Tools and Materials You'll Need
Collect these tools and materials before you start:
- Tape measure
- Level
- Drill
- Screws and bolts
- Posts and balusters
- Handrail
- Mounting brackets
- Concrete anchors (if needed)
- Safety glasses and gloves
Step-by-Step Guide to Stair Railing Installation
Step 1: Measure and Plan
Measure your deck and stairs precisely. Decide how many posts to use based on your local standards. Posts should ideally not be more than 6 feet apart to support a strong railing.
Step 2: Mark and Install Posts
Having stable posts is the most important aspect to having a solid railing system. Do the following:
- Use a pencil and tape measure to mark each post position.
- Drill small holes in the deck or stairs where the posts will go.
- Secure the posts with screws or concrete anchors, ensuring they are level and straight.
- Add brackets or additional supports for added strength
Step 3: Secure the Bottom and Top Rails
With your posts installed, install the horizontal rails:
- Measure and cut the bottom and top rails to fit between posts.
- Install the bottom rail first with brackets, making sure it is level.
- Secure the top rail so that it is level with the posts.
Step 4: Install Balusters
Balusters (or pickets) keep people from falling and support. Here’s how to install them:
- Space the balusters evenly according to safety codes (usually no more than 4 inches apart).
- Secure each baluster in place using screws or brackets.
- Make sure each one is plumb before tightening the screws.
Step 5: Mount the Handrail
A strong handrail makes it easier to climb up and down the stairs:
- Cut the handrail the same length as your stairs.
- Mount it to the top of the posts using brackets or screws.
- Make sure the handrail is a comfortable height (usually between 34 and 38 inches above the stair treads).
Step 6: Final Checks and Final Touches
Before finishing the project, do these last steps:
- Check that all screws and brackets are tight.
- Use a level to make sure everything is straight and secure.
- Sand rough edges and apply a weather-resistant finish to protect the railing.
Common Mistakes to Avoid
- Wrong Measurements: Always double-check before cutting materials.
- Skipping Pre-Drilling: Not drilling small holes first can cause the wood to split and weaken.
- Loose Fasteners: Tighten all brackets and screws snug so the railing does not shift.
- Disregarding Local Rules: Research local building codes so that your railing will meet safety requirements.
Making Your Railing Beautiful and Useful
Once installation of railing on stairs is finished, you may beautify with aspects like:
- LED Lighting: Adds safety and cool looks during night time.
- Planter Boxes: Adds vegetation to provide a sense of energy for your outdoor space.
- Custom Designs: Use unique materials like wrought iron, cable railings, or glass panels to have a modern appearance.
Explore Modern Steel Railing Designs: Combining Style and Strength to discover various railing options that enhance both the beauty and utility of your space.
Frequently Asked Questions (FAQs)
Why Professional Help Might Be Worth It
If you’re uncertain about your DIY skills or your deck demands unique design, hiring experts for stair railing installation can give you a safe and completed result. Professionals have the right tools and expertise to get the job done efficiently and precisely.
Get Started with Your Railing Installation
Installing deck and stair railings is a great way to enhance your outdoor space’s fashion and safety. If you require additional information on how to install railings, visit our guide on Installing Railings.
If you follow the above steps, you will have a safe, fashionable, and durable railing system that will last for years.
Upgrade Your Outdoor Space with KDFence & Decks
Looking to improve your outdoor area? We at KD Fence & Decks create and install long-lasting, fashionable, and secure railings, decks, and fences for you. With more than 10 years of experience and ACI-certified experts, we provide quality workmanship at affordable prices.
Order a Free Quote Today! Call +1 (716) 452-9220 or check KDFence And Deck Services.