Putting up a chain link fence might seem hard at first, but with the right tools, a good plan, and some patience, it’s a do-it-yourself project that you can handle. It can help make your yard safer, give you more privacy, and even increase the value of your property.
If you want to fence in your backyard, mark your property lines, or protect a business area, learning how to install chain link fence the right way is very important.
This guide will take you through the whole process, from putting in the fence posts to attaching the mesh rolls and tension wire. We’ll explain each step clearly and share tips so your fence stays strong for a long time.
Why Choose a Chain Link Fence?
Before you start, let’s see why a chain link fence is a popular pick:
- Durability: Chain link fences are made from galvanized steel, so they don’t rust easily and can handle bad weather.
- Cost-Effective: They cost less than many other kinds of fences.
- Low Maintenance: After you install them, they don’t need much fixing or cleaning.
- Visibility: You can see through them, but they still block people or animals from coming in.
- Quick Installation: They go up faster than wood or vinyl fences.
Tools and Materials Needed
| Item | Purpose |
|---|---|
| Post hole digger | To dig holes for fence posts |
| Level | To make sure posts stand straight |
| Measuring tape | To measure distances accurately |
| Fence stretcher | To pull the mesh tight |
| Tension bands and bolts | To attach mesh to posts |
| Terminal posts | Posts at corners, ends, or gates |
| Top rail | Horizontal bar along the fence |
| Mesh rolls | The chain link fencing material |
| Tension wire | Adds extra strength to fence |
| Concrete mix | Holds posts firmly in the ground |
| Pliers and wrench | For tightening bolts and wires |
Step 1: Plan and Mark Your Fence Line
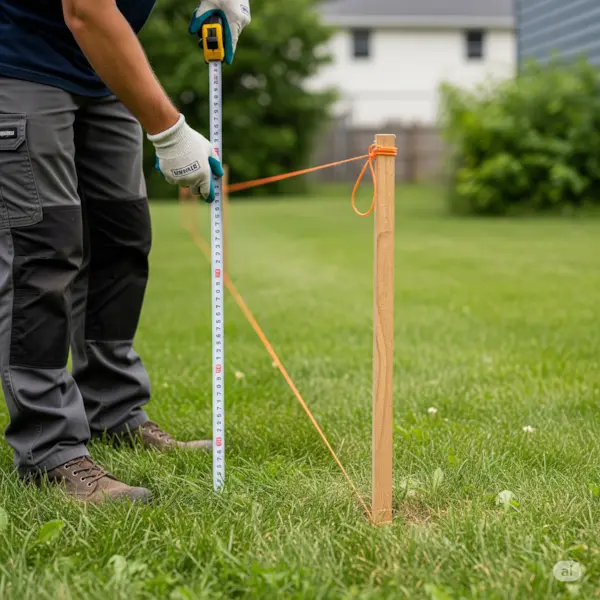
Good planning is the key to success. First, measure the area where you want your fence. Use stakes and string to mark the exact line of your fence.
Before you start digging, check your local rules and look for utility lines like water or electricity cables. In the U.S., you can call the local utility service with Call Before You Dig to avoid accidents.
Step 2: Install Terminal Posts
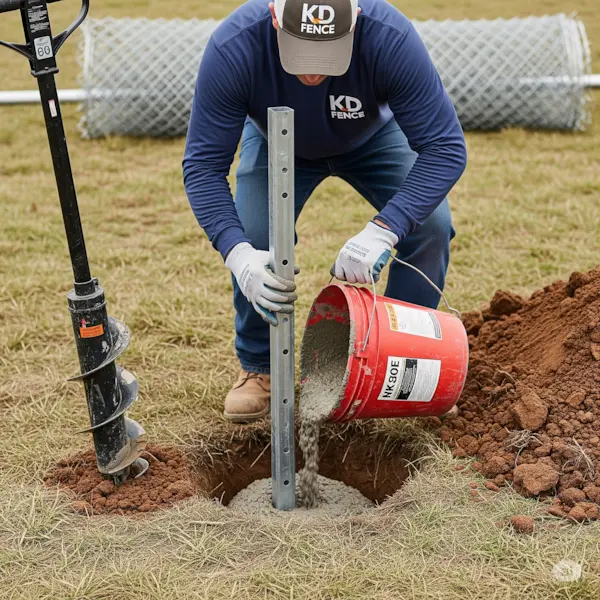
Terminal posts are the corner, end, and gate posts. They hold the most weight and tension, so they must be installed very well.
- Dig holes about 8 to 10 inches wide and 2 feet deep (this may change depending on your area’s frost line).
- Put the post in the hole, and use a level to make sure it stands straight.
- Pour concrete mix around the post and wait at least 24 hours for it to dry.
- Do this for all your terminal posts.
Step 3: Install Line Posts
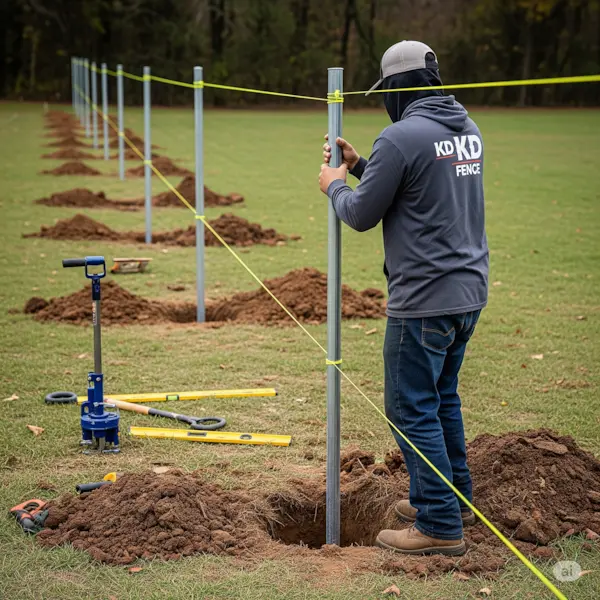
Line posts go between the terminal posts and hold up the fence fabric.
- Dig holes about 6 inches wide and 2 feet deep.
- Space the line posts evenly, about 6 to 10 feet apart.
- Set the posts in concrete and make sure they are vertical with your level.
- Let the concrete dry completely before moving on.
Step 4: Attach the Top Rail
The top rail runs sideways along the fence to connect the posts and make the fence stronger.
- Slide the top rail through the rail ends on each post.
- Use rail caps on the terminal posts to keep the rail in place.
- Check that the top rail is level and tightly secured.
Step 5: Install the Tension Wire
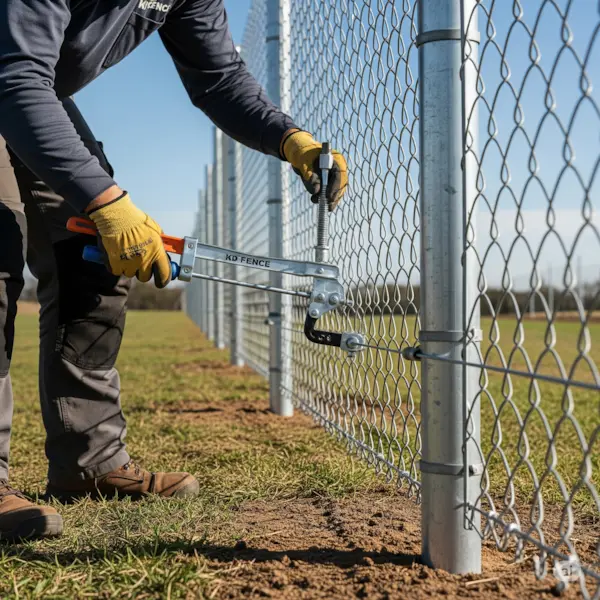
The tension wire goes along the bottom of the fence to keep the mesh tight and stop animals from pushing under.
- Attach the tension wire to the terminal posts with tension bands and bolts.
- Run the wire along the bottom next to the line posts.
- Secure it with tension bands every 4 feet or so.
Step 6: Unroll and Attach the Mesh
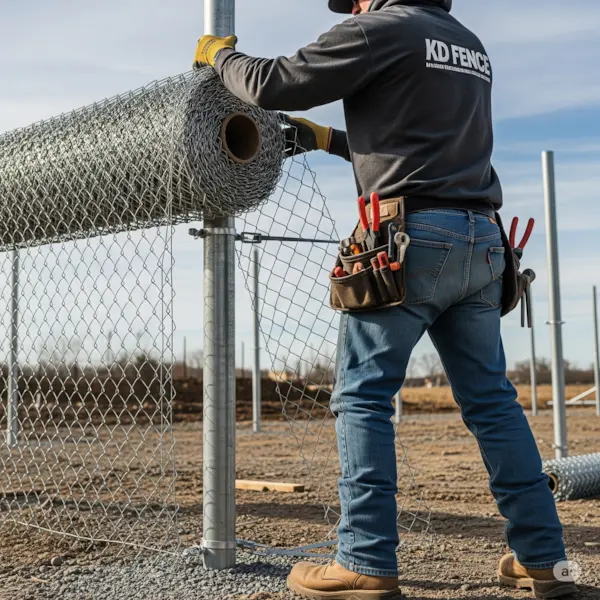
This step takes the most effort but is very satisfying.
- Start at a terminal post and unroll the mesh rolls along the fence line.
- Use a fence stretcher to pull the mesh tight.
- Attach the mesh to terminal posts with tension bars and tension bands.
- Secure the mesh to the line posts with tie wires or clips every 12 to 18 inches.
- Use pliers to twist the tie wires tight so the mesh fits snugly.
Step 7: Secure the Mesh to the Top Rail and Bottom
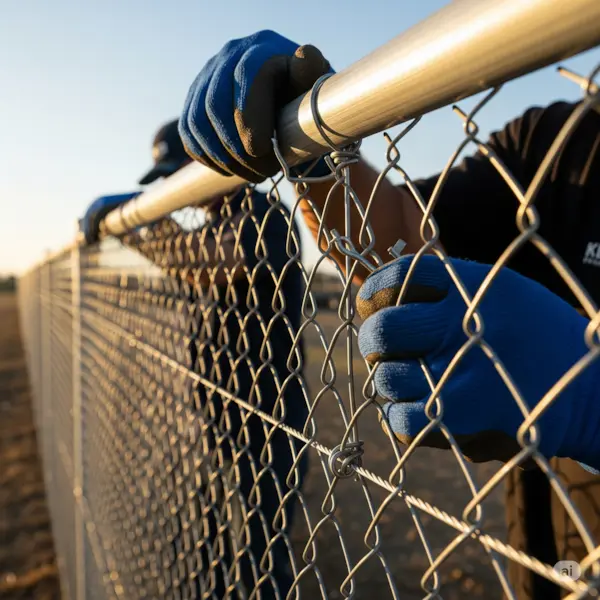
- Use tie wires or special clips to fasten the mesh to the top rail every 2 to 3 feet.
- Attach the mesh to the tension wire at the bottom the same way.
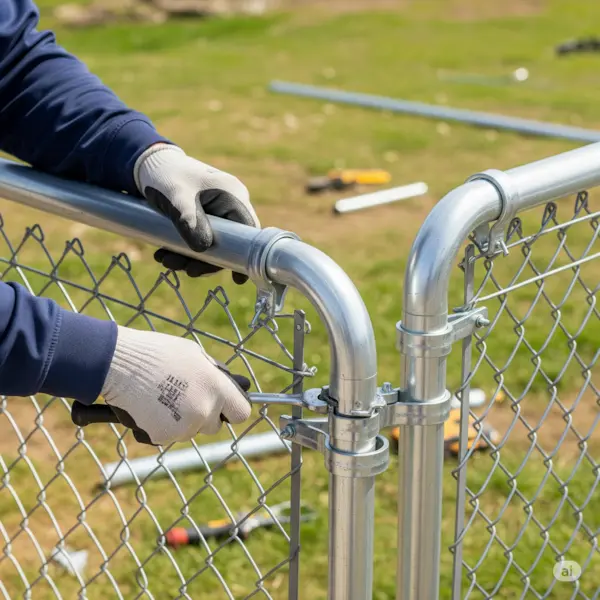
Step 8: Install Gates (Optional)
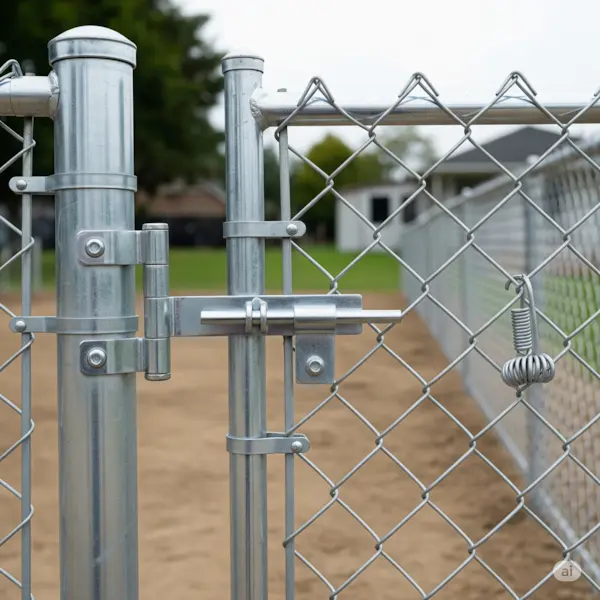
If your fence has gates:
- Attach the gate hinges firmly to gate posts.
- Hang the gate and make sure it swings easily and closes tightly.
- Install latches or locks to keep the gate secure.
Tips for a Successful Chain Link Fence Installation
| Tip | Explanation |
|---|---|
| Check local regulations | Find out how tall your fence can be and where it should go. |
| Use quality concrete | Keeps posts steady so the fence doesn’t move over time. |
| Don’t rush the tensioning process | Tight mesh means no sagging or loose spots. |
| Wear gloves and safety glasses | Protects your hands and eyes while working. |
| Work with a helper | Makes handling heavy posts and mesh easier and safer. |
Common Terms to Know
- Terminal Posts: Corner, end, and gate posts that hold the fence tight.
- Line Posts: Posts in between that support the mesh.
- Top Rail: The horizontal bar that connects the posts.
- Tension Wire: Wire along the bottom that keeps the mesh tight.
- Mesh Rolls: The chain link fabric for the fence.
- Tension Bands: Metal strips that fasten mesh to terminal posts.
Why Professional Help Might Be Worth It
If your land is uneven or your fence will be very long, hiring a professional can save time and stop mistakes. Experts make sure your fence meets local rules and lasts a long time. According to the National Association of Home Builders, having a fence installed by a pro can add value and make your home look better.
For more information on property fencing rules, you can explore our article on Fence Height Laws: What You Need to Know Before Building.
Conclusion
Installing a chain link fence is a smart and affordable way to protect your property, mark boundaries, or keep pets and kids safe. By following this step-by-step guide on how to install chain link fence, you can build a strong, professional-looking fence without paying a contractor.
Remember to plan well, use the right materials, and take your time. With good care, your new fence will keep your property safe for many years.
Frequently Asked Questions (FAQ)
If you want to improve your property with a strong and nice-looking fence, KD Fence & Deck can help. With over 10 years of experience and ACI-certified professionals, they specialize in designing and installing fences that are durable, stylish, and safe for your needs.
Get a free quote today! Call +1 (716) 452-9220 or visit kdfencing.com.